
If you are a physician or in the medical field where the Artacent wound graft is beneficial, contact Tides Medical to learn how to increase patients’ access to these products. Partial video transcription below:
Today we’re going to be applying an Artacent wound Graft to a diabetic pressure ulcer. This is the third graft this patient had placed. We will be doing it in the office setting to show you how easy it is. First, I want to show you how easy this is as I’m doing it with no assistance, which is great for social distancing.
Step 1. Put on gloves and prep the wound site.
Step 2: Debride the wound. This is probably the most critical step and sometimes people are not aggressive enough. We want to make sure this is a red granular wound base so that the graft is going to take so do not need to be shy about this. If you are not debriding all the dead tissue, the wound graft will not take well. We are excisionally debriding the wound. Our patient is not numbed because she is neuropathic so can still feel me touching it. It is not painful like you think it would be. I am okay with this bleeding. We want it to bleed so do not be afraid of that. So we have a nice red, granular wound. I’ve already pre measured this so I know this graft is going to take a 2×2.
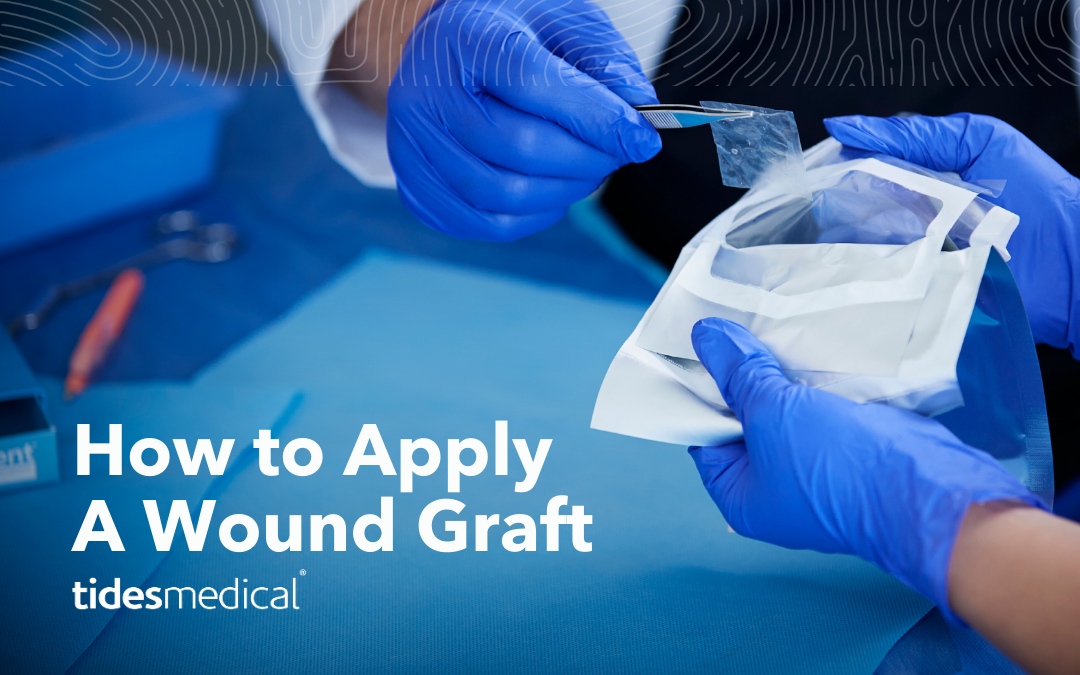
Step 3: Apply the Artacent Wound Graft. The reason why I like these grafts is because they are so low profile. It is not big and bulky, it’s infused with all these growth factors, it’s not immunogenic, it’s going to take right to this wound. Now that I have it nice and red, and granular as far as the would goes, we’re just going to place it right on. I want there to be a little bit of an overlay. The next thing that you do not want to miss, is this should be a piece of adaptic, or something that is not going to stick to the wound.
Step 4: Apply Saline-Moist Gauze. Drench your gauze with saline so you do not dehydrate the graft or the wound
Step 5: Add dry gauze for reinforcement. (Especially if you were properly aggressive with debriding the wound.
Step 6: Wrap it up. When bandaging it, be careful and bandage it up a lot because using the saline moist gauze could leak through. As long as it is not dripping or anything, a little bit of strike through is fine. I want it to strike through a little because that means bleeding, which we need to heal. After the dry gauze, apply bandage. It does not have to be overly large, just something to hold everything in place.
This process is not difficult and offers huge benefits to the patient just by infusing that wound with those growth factors and with debridement in addition to stimulating some bleeding and healing to the wound site.
The next unsaid secret is off loading. The patient will wear an off loaded boot, and sometimes a cane or crutch to take off additional pressure.
The patient would keep this bandage clean, dry and intact for a week before coming back to the office. We do not want to start debridement for at least two weeks because we want to make sure the graft completely takes.
And she’s all set! It will be incredible to see what that wound looks like in a week or two.
If you have any questions about wound grafts or how to apply our amniotic tissue graft, please do not hesitate to contact us for more information.
 Marc Stemler,
  Mora Melican, Ph.D., VP of Operations, Research & Development
 LESA CATALON,
 DAVID CASTILLE,


 JOSH WILLETT,
 JEFF MONTGOMERY,
 MIKE RIDDLE,
 BENJAMIN KIMBALL,
 DOUG PAYNE,


")
")