
In this first post of our three-part series on APLICOR 3D, we’ll explore the materials and equipment required to implement this innovative skin graft application solution. Whether you’re preparing your clinic for the procedure or curious about how it works, understanding the supplies is key to success.
The APLICOR 3D Ecosystem: Key Devices and Kits
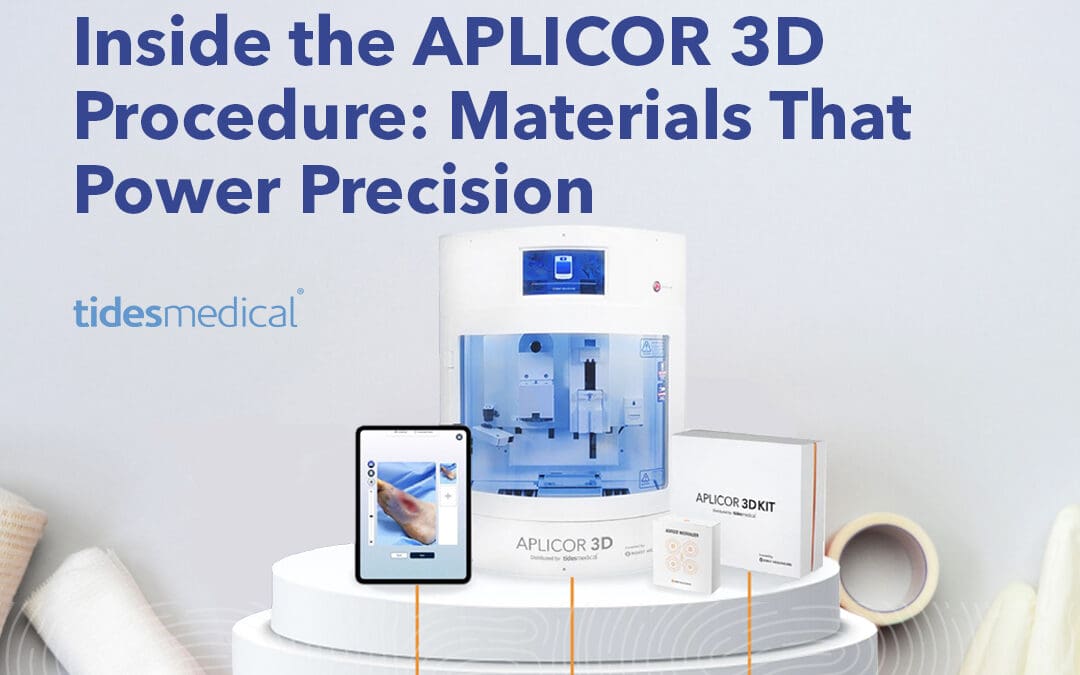
At the heart of the APLICOR 3D system are three essential components:
- AiD Regen Tablet – An integrated AI-powered device used to capture wound images, measure, and control the printing process.
- APLICOR 3D Printer – A specialized tissue-regenerating printer that fabricates the personalized scaffold using patient-derived biomaterial.
- APLICOR 3D Scaffold Kit – A single-use supply kit containing micronizers, dispensers, and other printing accessories tailored to different wound sizes.
Together, these components form APLICOR 3D into a compact yet powerful platform for real-time skin graft creation.
Supplies Provided by Tides Medical
Tides Medical provides a variety of essential tools to complete a successful treatment. This includes the APLICOR 3D Scaffold Kit which arrives pre-configured based on wound size (Small, Medium, or Large). For each case you will need the following, which are provided by Tides Medical:
- PCL (polycaprolactone) – A biodegradable polymer used in the scaffold structure. Each kit comes with a precisely measured length:
- Small: 364 mm
- Medium: 667 mm
- Large: 1,100 mm
- Bed Film – A thin, sterile sheet used as a base layer for printing the scaffold (1, 2, or 3 included depending on kit size).
- Dispenser – Specialized nozzles and docks for scaffold and Bio Ink printing.
- Luer Connector – For transferring micronized fat and fluids.
- NFC Tag – Required to initiate the printing process and communicate data to the printer.
- Sensor Tray – Used for calibration and printing accuracy.
- Matrix Plate – Supports the bed film during the printing process.
These components are precisely engineered and should not be substituted with any other components. The integrity of the scaffold and the success of the treatment depend on using the exact materials specified.
Additional Required Materials (Not Provided)
In addition to the scaffold kit, several standard medical supplies are needed to complete the APLICOR 3D procedure. These items must meet specific criteria:
Syringes:
- 50ml syringes
- 10ml syringes
- *5ml syringes – For printing Bio Ink (exact specs required)
Needles:
- *21-gauge, 1-inch needle – Required for final Bio Ink application.
Other Essentials:
- Normal saline (50ml) – For tissue rinsing and Bio Ink preparation.
- Surgical tools – For fat harvesting and wound debridement.
- Syringe caps – For sealing during processing.
- Standing rack – Holds syringes during tissue separation.
- Waste tray – For safe disposal of used materials.
All materials marked with an asterisk in the procedural overview must be exactly as specified. No substitutions are allowed for these critical items, ensuring safety and reproducibility in clinical use. Additional supplies without the asterisks can be substituted at the professionals’ discretion.
Micronization Equipment
A critical step in the APLICOR 3D process is the micronization of harvested adipose tissue. This involves passing fat between paired syringes using a color-coded series of micronizers:
- Red Micronizer – Coarse breakdown
- Yellow Micronizer
- Green Micronizer
- Blue Micronizer – Fine refinement
Each stage reduces the fat to a more usable consistency for printing while preserving cellular integrity, preparing it to become Bio Ink.
Material Size Considerations
Because APLICOR 3D scaffolds are custom-printed for each patient, the selected kit size (Small, Medium, Large) determines the length of PCL and the number of bed films. Choosing the right size ensures adequate coverage for the wound without excess material waste.
Material Preparation Tips
Here are a few best practices to ensure everything runs smoothly:
- Double-check your supply list before beginning. Some items, like the specific 21G-1” needle or 5ml syringe, must be exact matches.
- Prepare the saline syringes ahead of time, leaving 10 mL of free space to allow for gentle mixing with the adipose tissue.
- Securely attach the bed film to the matrix plate before printing.
- Label syringes clearly during the Bio Ink separation step to avoid confusion.
Conclusion: The Foundation of Innovation
APLICOR 3D represents a leap forward in chronic wound care — but its success begins with meticulous preparation. From specialized scaffold kits to exact syringe and needle specifications, the right materials are critical for delivering consistent, effective results. In the next blog post, we’ll dive into the roles and staff needed to complete an APLICOR 3D generated skin graft.
For now, having a deep understanding of the tools at your disposal lays the foundation for safe, precise, and personalized wound care.
Want to learn more? Contact our team for support in ordering APLICOR 3D kits or setting up your clinical workflow.
 Marc Stemler,
  Mora Melican, Ph.D., VP of Operations, Research & Development
 LESA CATALON,
 DAVID CASTILLE,


 JOSH WILLETT,
 JEFF MONTGOMERY,
 MIKE RIDDLE,
 BENJAMIN KIMBALL,
 DOUG PAYNE,


")
")